How To Fix “Abutment Top Cap Angle Violated” Error in 3shape

How To Fix “Abutment Top Cap Angle Violated” Error in 3shape

Summary: Over in the Facebook 3shape Study Group, we get this question weekly, if not more often, about how to fix this “Abutment Top Cap Angle Violated” error in 3shape. This guide was originally written by Sevan Pulurian and I thought it had some really great info so I wanted to feature it on this blog.

Huge thank you to the 3shape Study Group and everyone who makes the online 3shape community such a great one to be a part of!

If you are designing any implant restoration in 3shape, then there could be chances that you have received the error message “Abutment Top Cap Angle Violated” when trying to finalize your design.

We see this question come up on a weekly basis and there are lots of 3shape users out there who receive this message.

Solution to Fix Abutment Top Cap Angle Violated in 3shape:

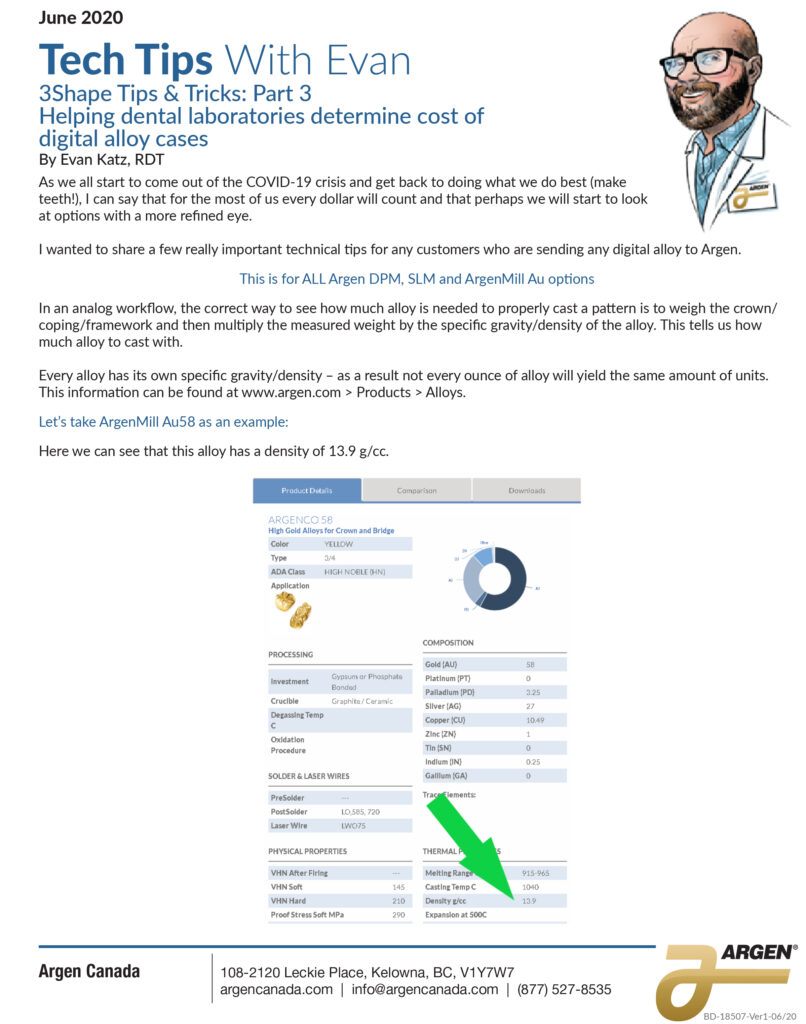
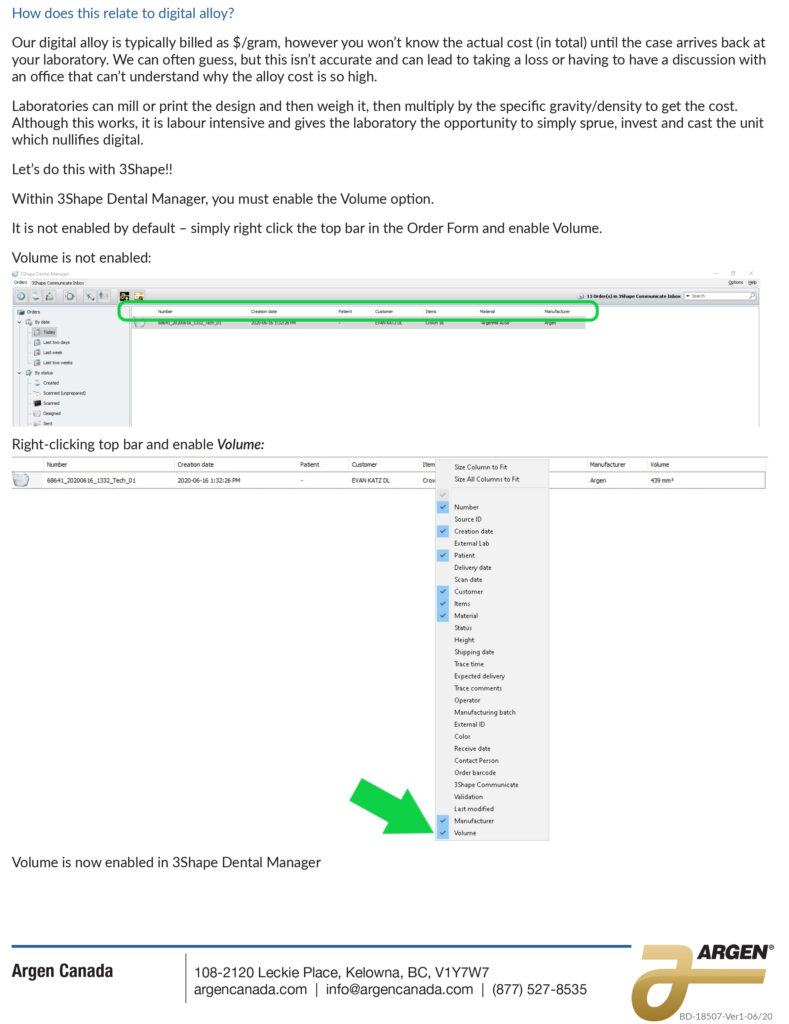
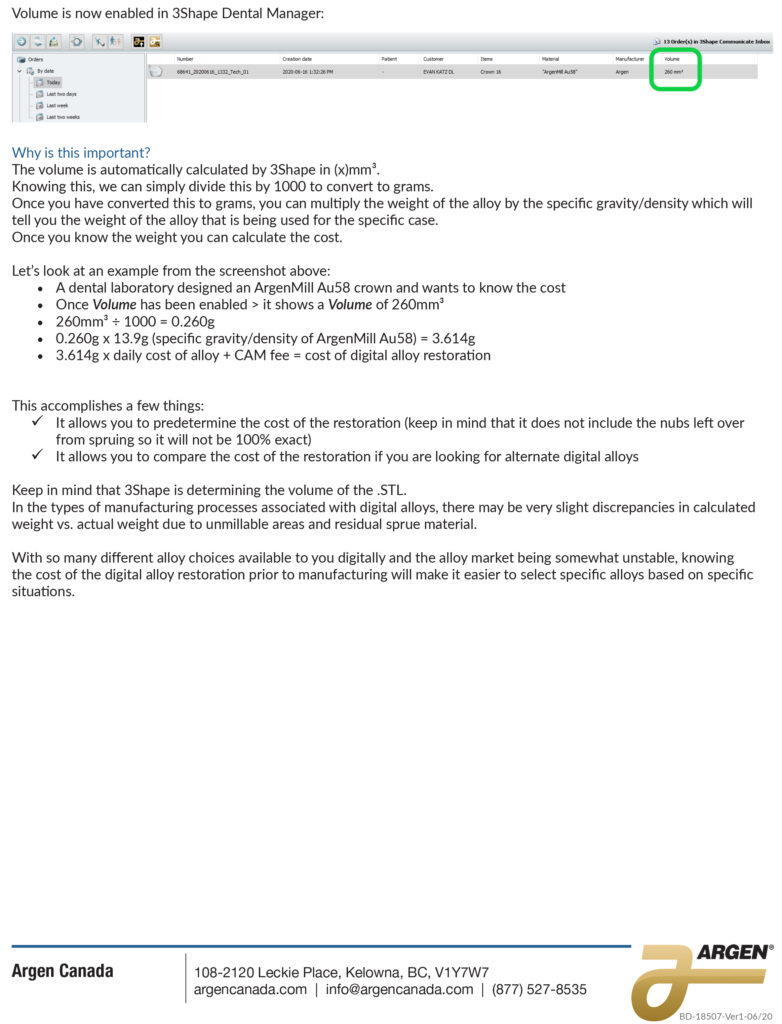
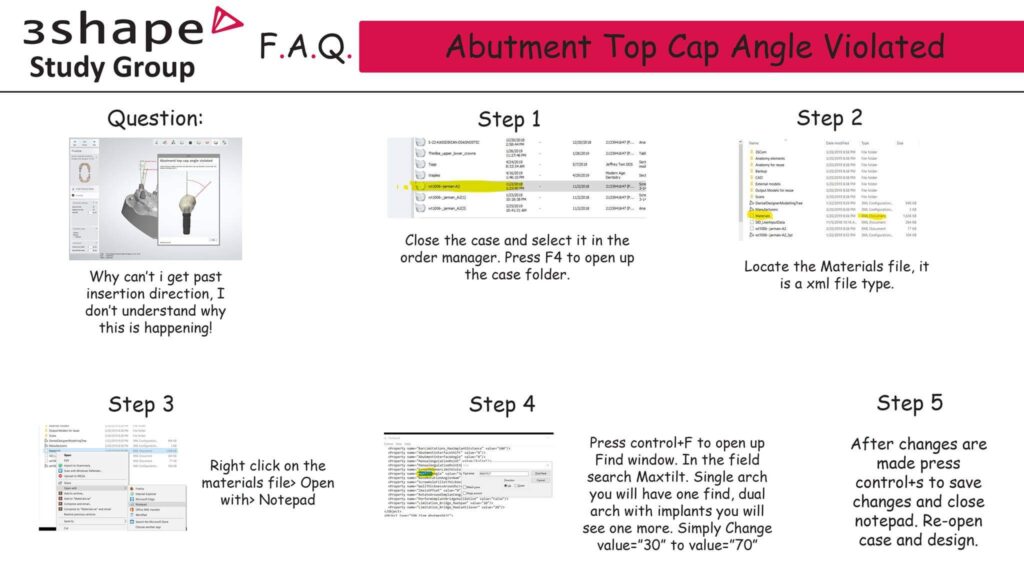
Alright! Now let’s take a look at how we solve this issue. Just follow the steps below or the ones found in the infographic above and you’ll be well on your way.

Note: This solution involves modifying material files and may corrupt your order and make it unusable if not properly edited. We take no responsibility for any problems this may cause to your dental system and it is advisable to make a backup of your order before proceeding

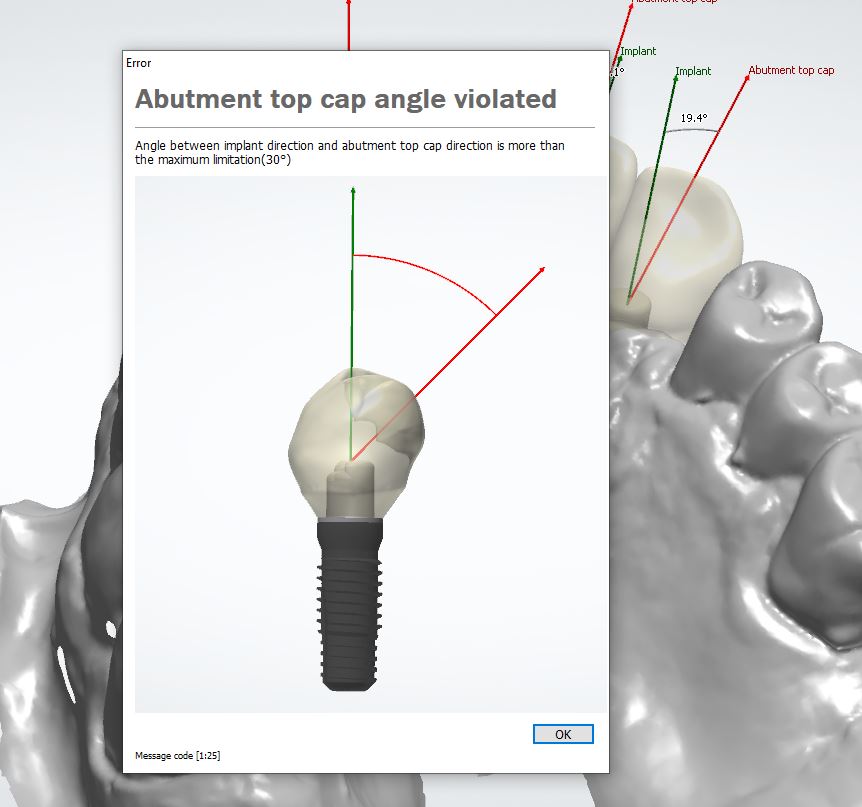
Step 1: Firstly you’ll see an error saying Abutment Top Cap Angle Violated

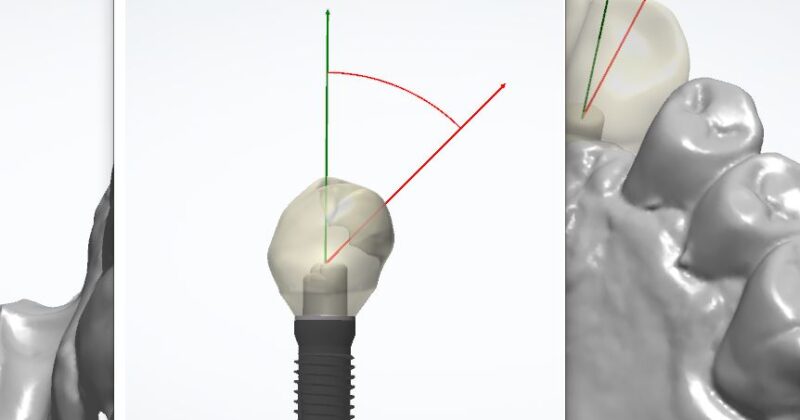
Error: Angle between implant direction and abutment top cap direction is more than the maximum limitation (30°) Message code [1:25]

This generally happens because there’s an error with how the implant insertion direction detects the transformation during the design. No actual limitation has been violated.

Step 2: Close The Case and Explore in Windows

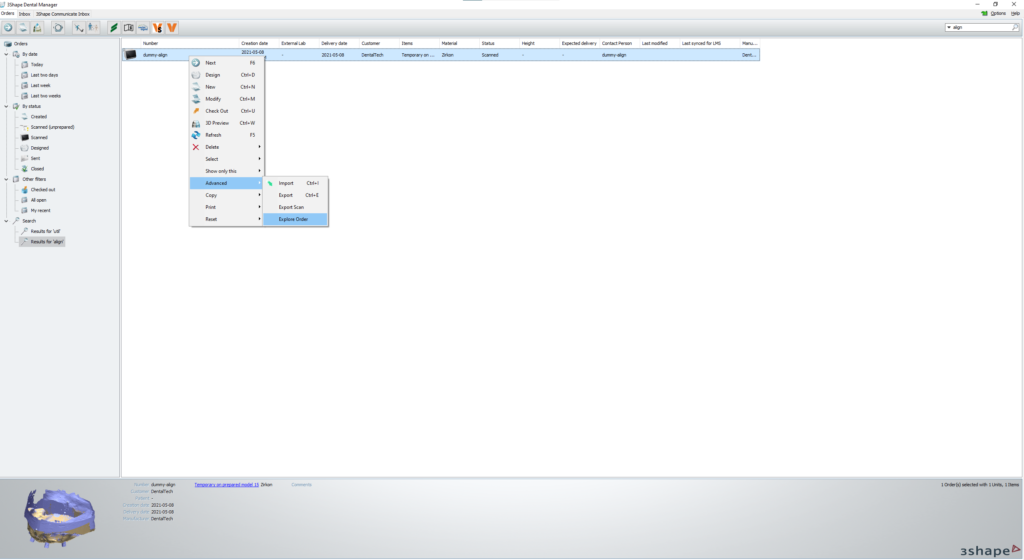
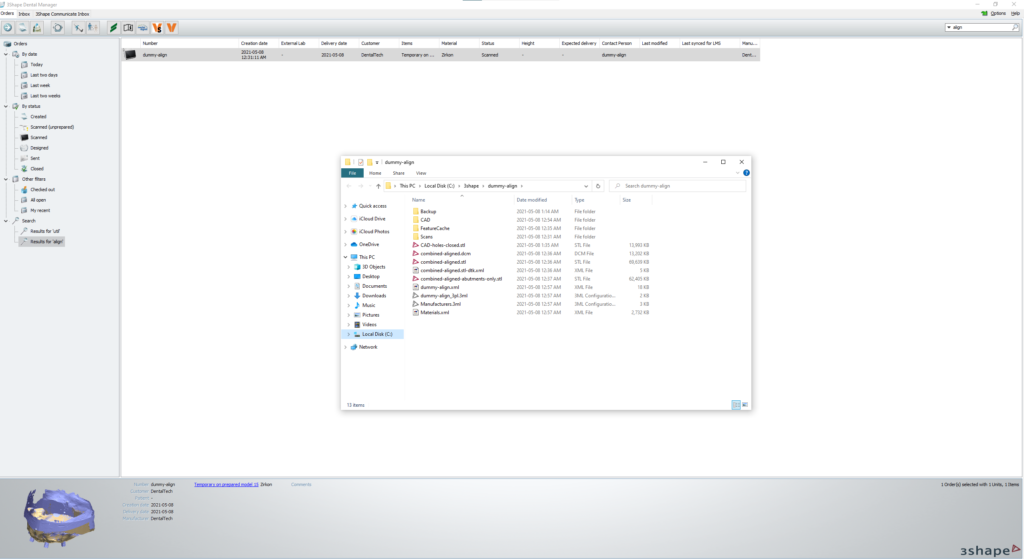
You’re going to want to close the case, save the design to speed up the redesign process later if you’re prompted to do so. Once the case is closed, go to Dental Manager and highlight the case, right click and advanced > explore order, or simply press F4 on the keyboard as a shortcut to open the case folder in Windows Explorer

Step 3: Locate & Open Materials.xml File

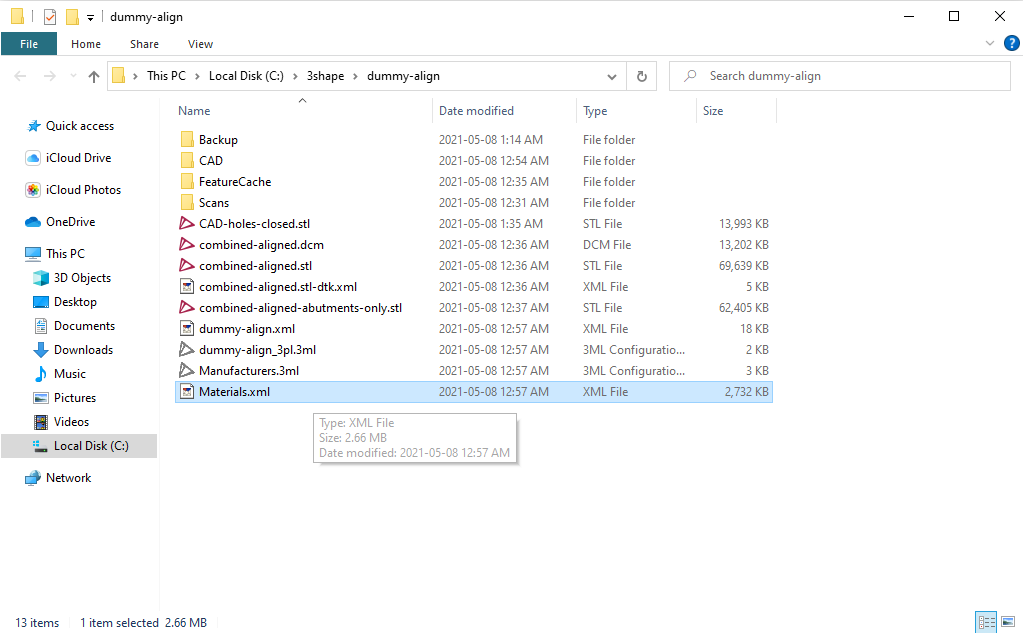
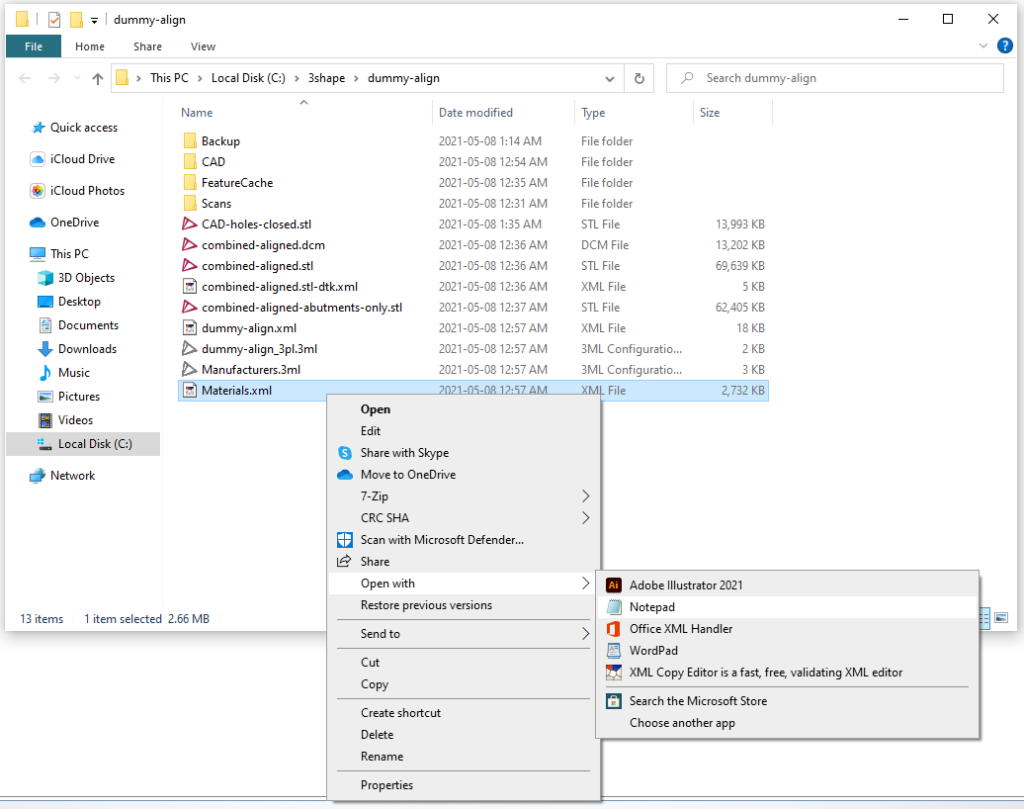
Locate the Materials.xml file in the Explorer folder and right click on the materials file > Open With > Notepad. (Alternatively you can use a dedicated xml editor, the one I use is XML Copy Editor)

Step 4: Edit Materials.xml File

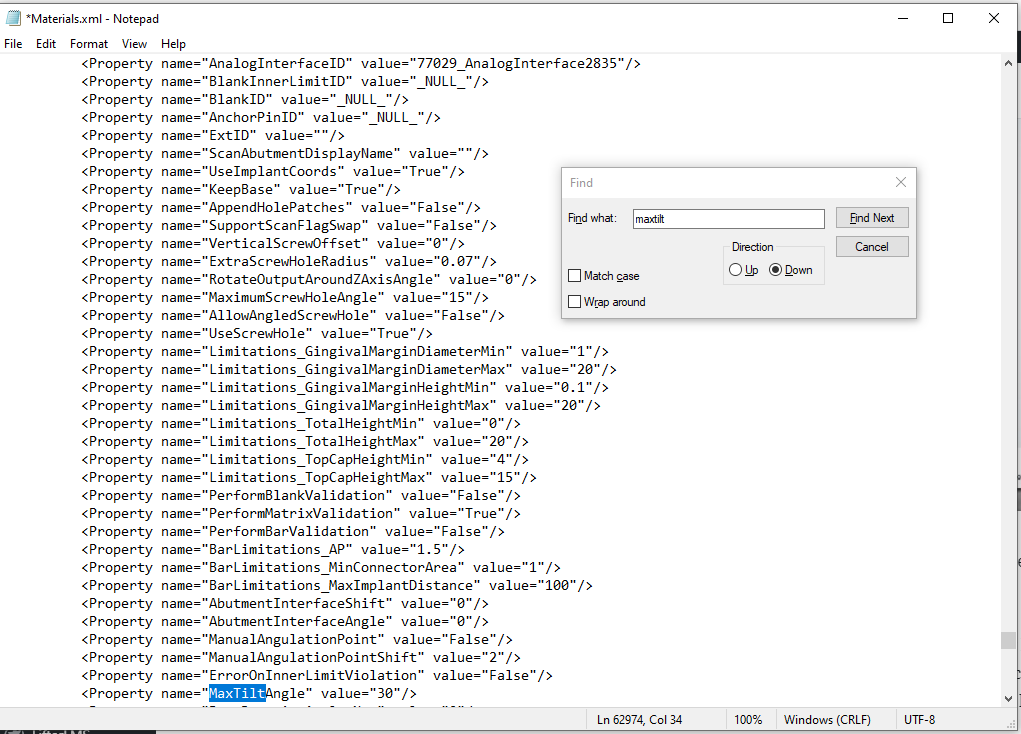
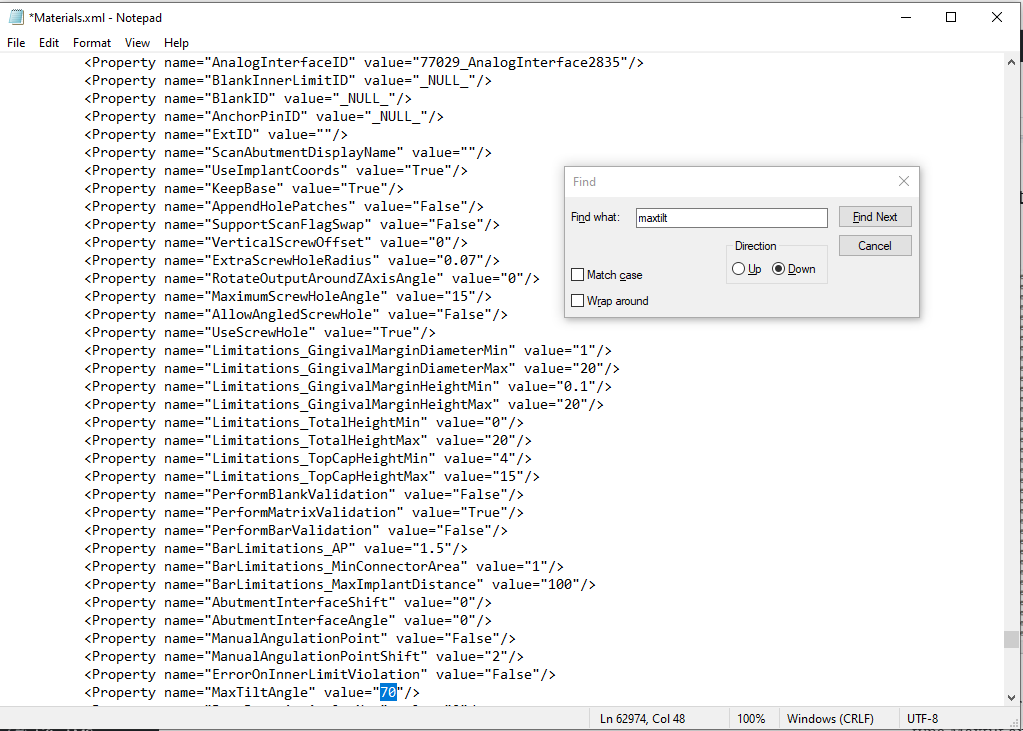
In Notepad, press ctrl+f to open up the search dialog box. In the search field type Maxtilt and press enter. (Note: For a simple single implant case, you will have one result, for multiple abutments or multiple arches, you will have multiple results that you will need to modify). Once the result is found, simply change the value from “30” to “70”

After the changes have been made, go to file > save, or hit ctrl+s to save your changes and close notepad.

Finally, re-open the case and proceed with the design!

Problem Solved!

About Minh Tran

minh_400w_jpg

Minh Tran is a 2nd generation dental technician from Windsor, Ontario, Canada. With 15+ years of experience, primarily as a CAD/CAM dental technician, Minh was one of the first users of 3shape Dental System in Canada and brings a wealth of knowledge. He is a lecturer, trainer, and has been a speaker, consultant, and technical advisor for multiple companies including 3shape, Asiga, core3dcentres North America, Fullcontour, Pritidenta, DAL, Medentika, and Abutment Direct.

Minh has served on the program advisory committee of St. Clair College in his hometown of Windsor to develop a new Dental Laboratory Technology program. Minh is a member of the American Prosthodontic Society and currently serves on the communications committee. He is also the founder and creative director of DentalTechTips, an online independent publication and blog focusing on unbiased product reviews, offering tips, tricks, tutorials, and the latest and greatest in the dental laboratory industry.

Alloy Weight Calculator

Inspired by a wonderful TechTip by Evan Katz, I decided to scrub through the Argen website for all the data and input into a simple calculator. You can read the article below. Enjoy!


Millbox Tips and Tricks: Part 1 –  With Evan Katz

Millbox Tips and Tricks: Part 1 – With Evan Katz

Hey, whats up guys! Today we’ve got a special post for you. This article was written by Evan Katz and I thought it had some really great info so I reached out to see if we could feature it on this blog.

Huge thank you to Evan and the team over @Argen Canada for letting us share it with our readers!

Evan Katz RDT, Senior Education & Product Development Manager at Argen Canada Evan is an RDT and Technical Specialist/Trainer in all aspects of CAD/CAM workflow, including Intraoral software and hardware, CAD design, CAM strategy & mill repair.

Understanding how CAM software fully functions can take some time.
In most cases, it also helps to fully understand how your CAD software works. In the day-to-day rush of having to scan, design mill, sinter and finish so many cases, we sometimes forget that the software we use (either CAD or CAM) can often help us out by allowing us to become more efficient, but mainly more consistent.

Argen sells, services and supports Roland mills – these dental mills come with MillBox software, developed by Lab and CIMsystems SRL. As of 2017, we only sell MillBox, which runs Sum3D in the background. Updating your Sum3D licence to MillBox is quite easy!
MillBox offers a number of under-utilized tools that can help you become more effective such as:

  • Internal cavity adjustment
  • Screw access hole adjustment
  • Importing contact area data **SNEAK PEEK**

Internal Cavity Adjustment:

When you design an abutment or a screw-retained crown from a scan body (library abutment), we do not have any control over the spacer between the titanium base and the internal aspect of the abutment/crown. This can lead to a loose fit which will result in too much rotation between the titanium base and the part. This can be somewhat counterbalanced by cementing the base to the part and using the contact areas as rotational stops, however with MillBox this can be controlled.The spacing within internal cavity can be adjusted very easily.

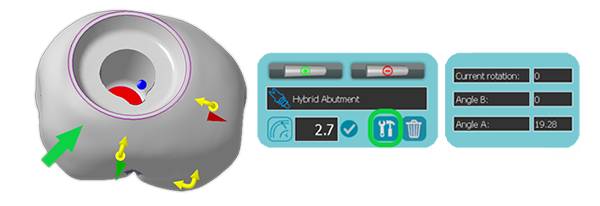
Simply enable the abutment/crown by clicking onto it – then click the Tools option:

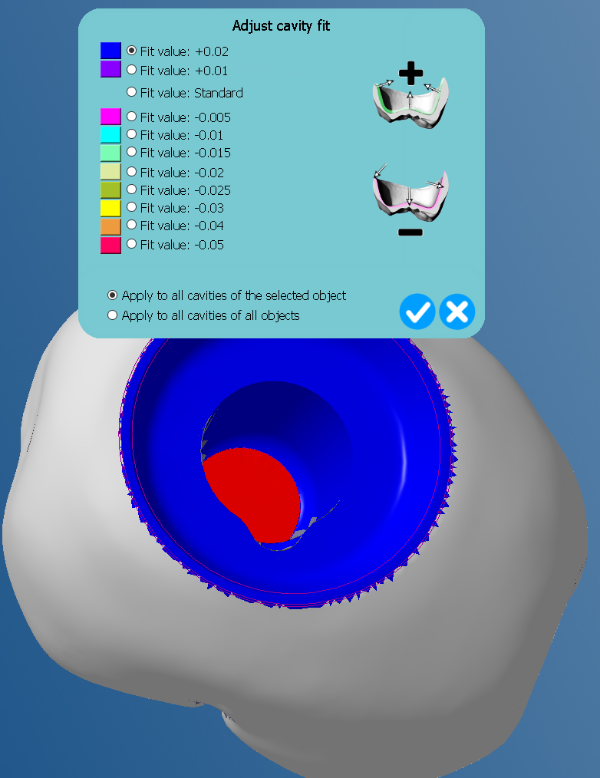
Now open the Cavity Fit option within the sub-menu, which in-turn open the Adjust Cavity Fit menu

You can now make changes to the internal cavity, either using the positive numbers (+) to make a tighter fit, or use the negative number (-) to make a looser fit. Once you have decided how loose or tight you want to make the part, by clicking the check mark the internal cavity will turn the color associated with the value.

Keep in mind this will not change the .STL, it simply adds or removes the specified amount from the milling parameters

Screw-Access Hole Adjustment:

If you are not using a scan body to create a screw retained abutment or crown, you will likely be manually placing the hole into your crown through your CAD.
In some cases, the diameter of the screw access hole cannot be adjusted in CAD and you will be left with either a hole that is too small or too large. Both situations will require some post-processing work which can be done using MillBox CAM. This can be done for both library and non-library abutments.

Within MillBox, you have the ability to adjust the diameter of the screw-access hole, as well as the plunge depth. In this case, we will concentrate on the screw-access hole diameter.

After the .STL has been imported, click the Tools button on the left side of the software.
Once the Tools options are open, click the Curves and Surfaces icon to open up that specific operation.
Once this has been opened, a list of specific operations will open on the top banner area.
When clicking Change Cylinder Size, your .STL will disappear and only the milling curves will be present.

On the screw-access hole curve you will see 2 gold dots. By clicking on a dot, it will open up a graphic that shows the diameter of the hole. This can be changed to make it smaller or larger all depending on your situation.

Again, this will not affect your .STL, it just adds a milling offset to the hole milling operation.

Importing Contact Area Data **SNEAK PEEK**

In an upcoming version of Argen MillBox, you will be able to export your contact areas that you have created in 3Shape CAD. Millbox will be able to recognize this as a contact and avoid placing support pins onto that area.

MillBox is a very powerful tool which if used correctly will help your laboratory gain superior and consistent milling results. Putting a lot of effort and time into your CAD design only to have less than ideal milling results is frustrating and often leads to additional post-processing time.

Let the CAD and the CAM work for you!

About Argen

For more than 50 years Argen, a family-owned American company and partner to dental labs worldwide, has served the dental industry and continues to invest in new and innovative product offerings to provide dental labs with affordable, high-performance products and industry-leading customer service. Argen.com

Analog is Not the Opposite of Digital

Analog is Not the Opposite of Digital

Analog Is Not the Opposite of Digital

You’re Doing it Wrong.

Many of us in the dental field have been using the word ‘analog’ improperly. We often refer to analog technologies as being anything preceding digital technology. That’s definitely not the case. So this post is to collectively save us all from ever sounding stupid to technology nerds ever again. And don’t worry, it’s not just us, I’ve seen the same mistake made in the New York Times.

I recall a video that referred to 1950’s classrooms as ‘analog learning’ as opposed to our modern classrooms’ use of computers and the internet. I’ve heard the work of contemporary digital artists and designers compared to the ‘analog art’ of painters. The real kicker, and reason for this post, is those who position traditional handmade work as the ‘analog’ opposite of digital dental technology.

Handmade isn’t Analog.

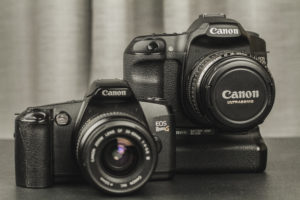
Restorations that are handmade are not analog, period. As an analogy, I recently picked up a used Canon Rebel G from the ’90s used to shoot film. I have had a digital SLR from Canon for years now, and they’re obviously extremely different. But we have to be careful not to confuse ‘old’ and ‘new’, with two very specific terms like analog and digital.

The word digital, to most people, refers to a device that can capture, store, or display data in a binary fashion. Ones and zeros, on and off, digital is all about numbers. Digital shouldn’t be confused with binary, of course, as digital simply means concrete values. The root word is digits, after all. Any system that utilizes solid values (or digits) is digital, binary is simply the most common system. Digital cameras, and conversely digital 3d scanners capture light with a sensor, that light is converted into data (numbers), so the use of the word ‘digital’ for your cell phone camera, DSLR, or 3shape is accurate.

Analog, however, is a very abused word. I would venture a guess that the significant amount of technicians have used the word ‘analog’ to refer to anything done traditionally. If the new, fancy robot 3D scanners are ‘digital’ then our aging techniques are ‘analog’, right? Not at all. Leaning back on the camera analogy: Older cameras capture light with film, which is basically plastic, gelatin, and silver halide. When you take a photo (perhaps of an aesthetic full mouth restoration), photons hit this material and produce a latent (invisible) image, that can later be brought into view by bathing the film in various chemicals. You could write hundreds of blog posts on film development alone, but the point is that film photography is a chemical process. Conversely, when you stack porcelain, or process a denture, the materials go through various chemical and physical changes.

Digital 3D scanners and traditional techniques are quite different, but I’d rather hear the word ‘chemical’, ‘organic’, or ‘magic’ given to traditional techniques before ‘analog’.


Wait, What is Analog Then?

Analog, as its name suggests, refers to being analogous to something. If we’re referring to the adjective used in technology, the definition of analog is:

Of, relating to, or being a device in which data are represented by continuously variable, measurable, physical quantities, such as length, width, voltage, or pressure. – Wordnik

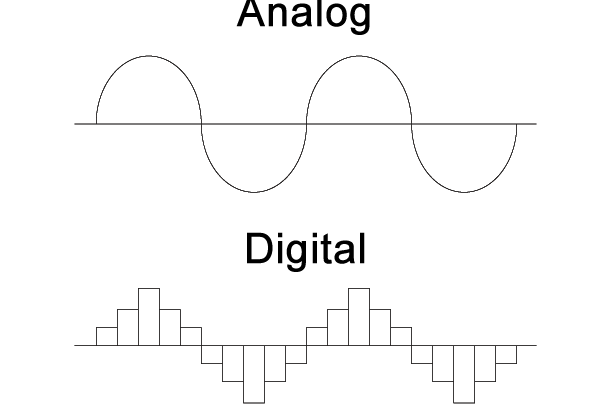
So a great example of an analog technology would be a vinyl record. The audio is stored as waves (variable data) within the grooves of the vinyl. Digital audio stores the data as numbers, as finite units of data per second found in mp3s and CDs. What’s important is that a vinyl record is legitimately something that deserves to be called ‘analog’. Dentures are not. Dentures and the techniques used to fabricate them are physical and chemical, there is no data (waves or otherwise) to be found as there would be on the record.

Plenty of older (and current) technologies are analog. Just be sure to ask yourself if that device has variable signals/data, or if that device is just really old. A television with a cathode ray tube (CRT) is an analog device; a cave painting of a man stabbing a mastodon with a spear is not. Ironically, CNC machines and 3D printers take digital signals and use transducers, pulse width modulation (PWM), or variable frquency drives (VFD) to produce analog signals that drive the spindles or lasers that ultimately produce a restoration. Those restorations are technically physical “analogs” of their corresponding digital designs.

Stop Saying Analog?

I know its hip to be anti-digital sometimes. But before we all drink a PBR and hop on our fixed gear bikes to the thrift store, we have to remember that just because something is old, that doesn’t make it ‘analog’. 35MM cameras, oscilloscopes, and the cotton gin are all old technologies, but only one of them is an analog device.

We pride ourselves in the dental lab industry for knowing tons of interesting things about art, science, and technology, but this is one adjective we should all cut back on a bit. The good news is we will always have our favorite noun: analogue! We can still say: “A picture is an analogue of a memory”, or “A cubic zirconia is an analogue of a diamond”, and “Cerec is an analogue of real lab work.”

DentalTechTip – How to Connect Remotely to your 3shape License Server


A quick tutorial showing how to connect remotely to your 3Shape license server.

Maybe you’re travelling or working from home at night after putting the kids to bed. Instead of taking your expensive and easily lost dongle with you, use this tip to connect remotely.

Thanks for watching!

https://www.teamviewer.com/en/download/
Cloudflare DNS: Preferred: 1.1.1.1 & Alternate: 1.0.0.1
OpenDNS: Preferred: 208.67.222.222 & Alternate: 208.67.220.220

Have a suggestion for a tutorial that you’d like to see? Drop a comment below and let us know.

Additive Manufacturing of Dental Devices: A Primer on Regulatory Affairs

Additive Manufacturing of Dental Devices: A Primer on Regulatory Affairs

Hey, whats up guys! Today we’ve got a special post for you. This article is written by Carbon and I thought it had some really great info so I reached out to see if we could feature it on this blog.

Huge thank you to Bryon and the team over @Carbon for letting us share it with our readers!


Additive Manufacturing of Dental Devices: A Primer on Regulatory Affairs

Digital dentistry has evolved from its beginning in the late 1990s. It started with the development of CNC machined crowns derived from digital scans of stone impressions and, by the mid-2000s, progressed to direct digital scans used to generate templates for thermoformed oral appliances. Current practice includes the direct fabrication of surgical guides and dentures and the promise of direct fabrication of aligners using 3D printing.

Carbon’s journey in this space began in 2017 with the release of DPR 10, a stone-colored material for rapid and accurate printing of dental models, with properties suitable for thermoforming models. This was followed by validation of third-party dental materials for surgical guides, custom trays, gingiva masks, and most recently, denture bases and denture teeth for printing on Carbon M Series printers. The growth of Carbon’s user base in dental and orthodontic laboratories has been nothing short of phenomenal. With that growth has come an awareness of the complexity of the regulatory landscape for dental materials, and for our customers’ readiness to meet those requirements. The goal of this white paper is to share our understanding of the current regulatory landscape of 3D printed dental devices.  

This white paper is not intended as a substitute for obtaining your own advice regarding legal and regulatory matters, including all FDA regulatory matters. Carbon is not providing you any such advice in connection with this white paper, but rather a basic outline of the regulatory environment. The circumstances of any particular participant in this environment can vary widely, and you should consult your own advisors to obtain advice specific to your circumstances.  


KNOW THE FDA BASICS

In general, the FDA does not regulate or approve materials, it regulates devices. Based on risk (Class I, II, or III), the FDA can clear a medical device for sale if (I) it demonstrates safety and is manufactured according to an appropriate quality management system, (II) it can be shown to be equivalent to an existing cleared medical device, or (III) can approve if it is a higher risk device that has had its safety and effectiveness established through more extensive pre-clinical and clinical studies. Since few dental devices fall into the third category, we will focus this white paper on low-to-moderate risk devices (the first and second categories).  

Low-risk devices (no need to demonstrate equivalence)

Deemed as Class I, these devices cover items such as toothbrushes, and in digital dentistry include surgical guidescustom trays, and the like. For this level of risk the manufacturer only needs to have in place a quality management system (manufactured under current Good Manufacturing Processes, cGMP), and have data on the safety of the device (generally biocompatibility and mechanical performance data). The manufacturer (or a distributor) is required to register with the FDA and list the device(s).  

Moderate risk devices (must demonstrate equivalence)

Deemed as Class II, these devices include denture basestemporary crowns and bridgesmouth guards, and aligners. For these devices, the manufacturer or distributor must prove their device is “substantially equivalent” to a legally marketed device which has the same purpose (indication for use). Proving that equivalence is described below.

The 510(k) process (how to demonstrate equivalence)

Proving to the FDA that a new medical device is equivalent to an existing medical device (called a predicate device) is referred to as the “510(k) Clearance Process.” Here “equivalence” means the device must treat the same condition in the same way, and its manufacture or composition must not raise any new questions of safety and efficacy. The establishment of “substantial equivalence” (SE) to a “predicate device” allows a manufacturer to legally market their device in the US. Class I devices are exempt from the 510(k) requirements (Figure 1).   

There are a few Class II devices that have been “down-regulated” and are exempt from the 510(k) process (“Class II exempt”). An example of this would be 3D printed denture teeth (FDA product code PZY). There are also a few devices that did not receive a risk category in 1976 when the Medical Device Amendments of the Food, Drug and Cosmetics Act were enacted. These fall under the “Unclassified” category, and most devices require 510(k) clearance for marketing (Figure 1). Relevant examples would be a mouthguard prescribed for migraine reduction (FDA product code OCO) or an over-the-counter mouthguard for treating tooth grinding (FDA product code OBR).  


Figure 1: Simple process flow showing different FDA clearance requirements for a single “clear” material used for making different dental devices.


FDA APPROVAL: WHAT DOES IT MEAN FOR DIFFERENT STAKEHOLDERS?

First, the word approval applies to high risk medical devices. All lower risk devices are “cleared.” A claim of a dental material having “approval” by the FDA generally means that its been 510(k) cleared for some indication. Clearance for one indication by the FDA or any other regulatory body (for example a Class IIa designation of a device in the EU) does not carry over to any other indications for use.

We’ve said that the FDA does not regulate materials. Yet, it regulates the materials used for 3D printing of dental devices. The following quotes from FDA should also help clarify this fact.

“The materials that the dental branch clears are, in fact, finished devices that are patient matched at the point of care.”

“Dental materials are finished because, in their current state, they are capable of functioning when patient-matched by the end user.”

So, even though they are not the finished medical device, their purpose is to generate a patient-matched medical device. Hence the FDA’s decision to regulate the “starting material.”

What about manufacturers or distributors? Are they regulated?  

A manufacturer or distributor of a 3D printing material capable of fabricating a finished device is regulated. A distributor could bring a device not cleared in the US into commerce in the US, but they would then have all the regulatory responsibilities (registration and listing, and if the device is Class II, submission of a 510(k) premarket clearance request).   

What about the laboratories? Are they regulated?   

This is a complex question. At Carbon, we are learning more and more about laboratories being FDA audited to see if they are adhering to good manufacturing practices. Laboratories have been exempt from registration but have been expected to be compliant with 21 CFR 820 (the FDA Quality Management Systems regulations). But as laboratories engage in more CAD/CAM and use regulated products, including regulated design software, they can veer into the realm of a manufacturer. If a laboratory modifies a design or uses software in conjunction with a material or a printer not validated by the software manufacturer (see below), or manufactures an oral appliance with a material not cleared for that end use, then the laboratory might be creating a misbranded (not appropriate for its indicated use) or adulterated (does not comply with appropriate standards) product.   

To be in compliance with 21 CFR 820, a dental laboratory needs to be able to demonstrate to the FDA that it has in place current Good Manufacturing Practices (cGMP). Its beyond the scope of this white paper to describe these requirements, but there are many consulting services available to help dental laboratories put the required systems in place.

What about 3D printers? Are they regulated?   

3D printers are not regulated because they are not finished medical devices. However, since the FDA regulates software capable of designing finished medical devices, the software developers work with both laboratories and printer manufacturers to validate the printers, materials, and post-processing ability to produce the finished device with required accuracy and final physical and safety properties.


KEY TAKEAWAYS

Going forward, laboratories need to carefully consider their use of a 3D printing material for the manufacture of dental appliances. Using a dental material to fabricate a device for which it is not FDA cleared can potentially be of risk to patients and can open the lab to regulatory penalties. A material certified for use in Europe (Class IIa) might not be in the US, and vice versa. If you manage a laboratory, follow the guidelines on the label for each material, and get reliable regulatory advice to see if you need to register with the FDA. Manufacturers and distributors need to ensure their materials have the necessary approvals in the regions where these resins are sold.

Dental and orthodontic professionals, software developers, material developers, and printer developers are creating an increasing number of devices to enhance and improve patient oral health care. Carbon is proud to be a leader in this activity and your trusted partner on this journey.

For additional information on Carbon’s dental solution, send us a note at dental@carbon3d.com.
About Carbon
Carbon is your partner for success, offering highly dependable end-to-end dental solutions powered by Carbon’s pioneering Digital Light Synthesis™ technology.
Carbon’s 3D Manufacturing solution is changing the dental industry with world-class materials and a digital workflow that seamlessly integrates into your existing production environment. Our intuitive software makes production easy and streamlined, and the 100% inclusive service and support ensure customer success every step of the way. Carbon’s subscription model links our success to yours, so you always have access to the latest materials and software, without worrying about the future.
Why the MCXL is the BEST e.max CAD Mill Out There

Why the MCXL is the BEST e.max CAD Mill Out There

Why the MCXL is the BEST e.max CAD Mill Out There

So I’ve got your attention. Do I really dare stake claim to a statement as bold as “the MCXL being THE BEST mill out there”? Absolutely not, the MCXL is a terrible mill.

Read the title over again carefully.

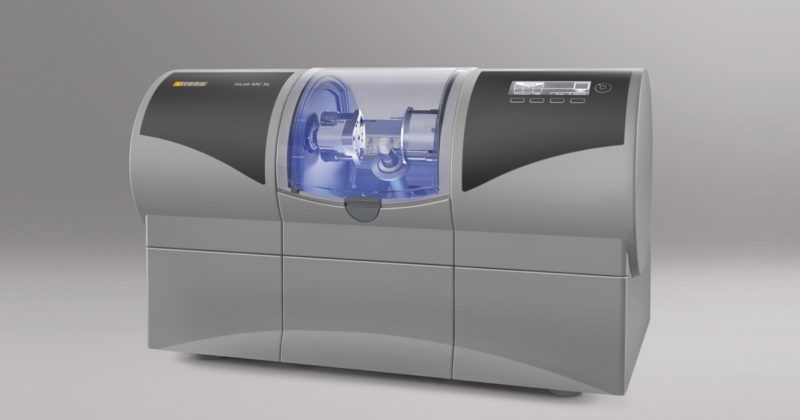
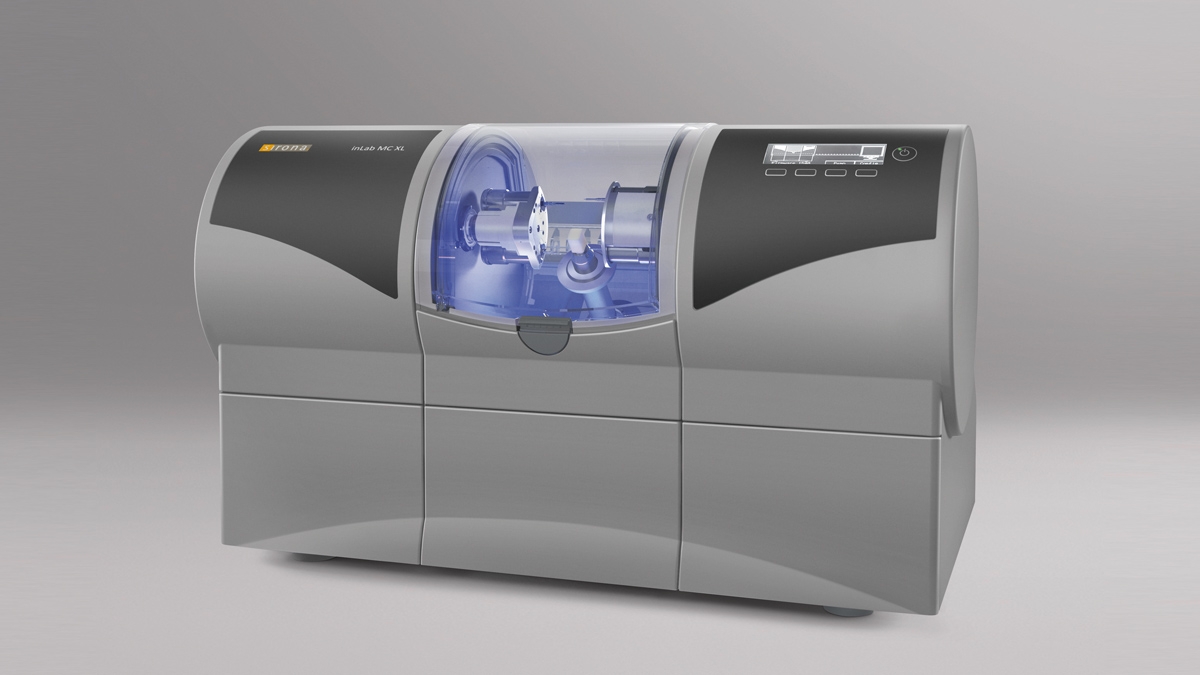
Truthfully, the MCXL is a terrible mill, but in my opinion, it is the “BEST e.max CAD mill” out there. It’s loud, its proprietary, and it’s track record is beyond unreliable. Personally, the one I’ve used at our lab since 2012 has gone through 10 motors, a few distribution boards, a fried main board that went POP and billowed smoke, 3 replacement PC towers, and approximately 2-3 chamber doors per year of ownership. Thankfully, mostly all covered under warranty. The Patterson service team member, David, practically lived at our lab at one point. Any more and we probably would’ve had to put him on the payroll.

Now, back to the main point of this post. The MXCL is indeed the best mill for e.max CAD, or blue blocks as they are colloquially referred to. (Even though they look more violet/purple to me personally. What do you think? Am I color blind? Throw your opinion down in the comments!) I didn’t reach this epiphany until a few months ago as a result of our lab purchasing an imes-icore 350i that was ‘capable’ of milling e.max. Notice the emphasis on ‘capable’.

Yes, with the 350i there was an option for a burr smaller than the width of my thumb. And yes, I was able to design in a CAD software package (3shape) that wasn’t intended for ‘clinically acceptable’ same-day restorations while the patient waits in the lobby with a magazine. And yes, I had CAM software that could nest at different angles and with different sprue sizes!

But when it came time to milling e.max with the 350i, the honeymoon period wore off quickly. Margins chipping, entire crowns breaking loose, poor tool life, longer mill times. How could this be possible? This machine can mill titanium! It weighs 500 lbs! It can tilt at 30 degrees in multiple directions. It can play game of thrones! It can mill everything… Click here to go to my YouTube channel and watch the full review. Now that I’ve finished shamelessly plugging my own content, back to our regularly scheduled programming.

It made me realize that I took that little MCXL money-pit for granted all these years. Sirona, for some odd reason, has had this unfounded vendetta against the dental lab industry and has been actively trying to eliminate the profession by directly targeting dentists as their usual modus operandi since… forever. Let’s set my personal feelings about that aside for a moment, and I’ve gotta say, Sirona did something very right with the MCXL. I can pay due respect to a feat of engineering when it is rightly earned.

My model of the inLab MCXL features 2 motors on each side, the grinding motion and simultaneous action rips through e.max blocks like a 2am run to taco bell does on its way through your digestive system. The torque driver supplied with the machine is dialed in to a specific setting to eliminate vibration in the mandrel. It took me almost 8 months before I thought to apply the same torquing principle to the 350i’s glass block adapter… which did indeed significantly reduce chipping rates!

Calling the MCXL a “Mill” is actually inaccurate. It is a grinding machine. The way that it operates compared to a standard mill is completely different. This gives it an edge over mills with “wet options” because it is a purpose built tool for a specific task. Yes, there are other purpose-built grinding machines out in the market like the Roland DWX-4W, the CORiTEC 140i, The IOS Technologies Ts150, Kavo Arctica, AG Ceramill Mikro IC, Carestream CS3000, VHF N4, and the Planmeca PlanMill40S. But I haven’t personally tested any of those machines to comment on their respective e.max grinding abilities.

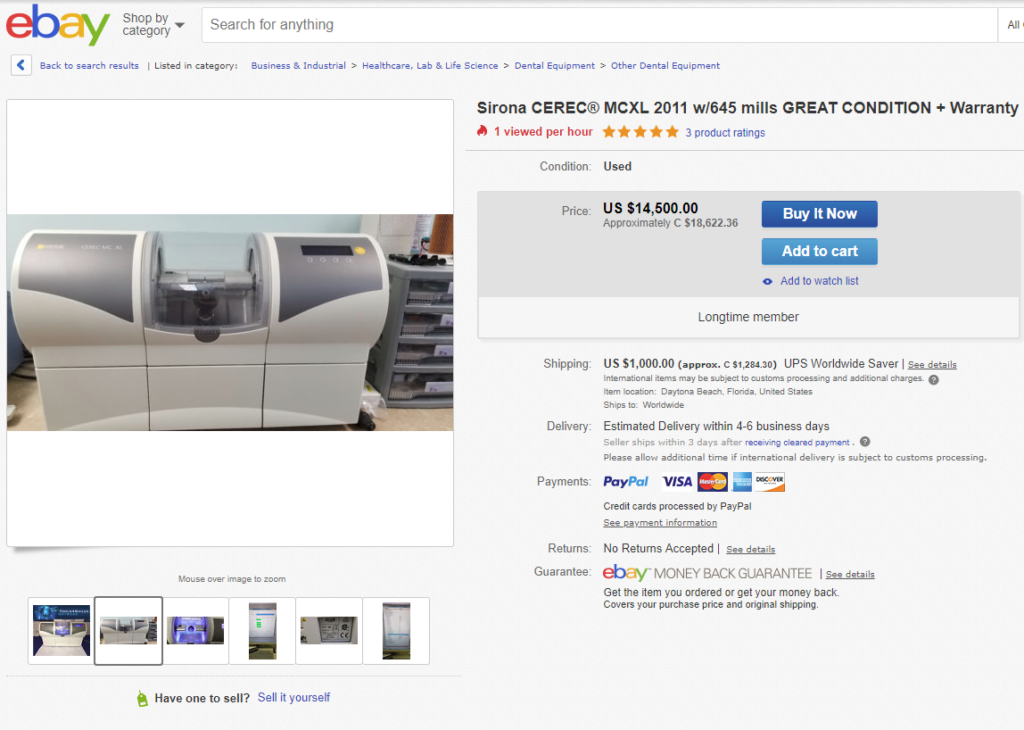
Taking it a step further, when the coolant that is used gets mixed with leftover grindings from the e.max, it amounts to nothing less than what I’d like to describe as ‘liquid sandpaper’. This is catastrophic for the seals and gaskets it just destroys them. Those cheap plastic MCXL chamber doors never stood a chance. My newfound respect was confirmed earlier this year when I had a chance to chat with a bunch of colleagues. They also mill e.max cad blocks, but on Wieland Selects, Rolands and even on DMG Ultrasonics. The consensus is that any and all CNC machines that mill e.max are prone to rapid deterioration. It’s simply the nature of the beast. The MCXL just happens to mill e.max much more quickly and produces desirable margins more reliably. Finally, the Pièce De Résistance, and what makes the MCXL stand out in its specific category as opposed to other purpose built wet grinders: How popular it is, and as a direct result of that, how cheaply one can come across a unit second hand. The used market for MCXLs is ripe for the picking.

As much as dentists like to try their hand at eliminating lab bills from their practices, many of them lack the time/staff/patience/know-how to operate a mill effectively, and their MCXL’s end up sitting in a corner collecting dust. Eventually, those lightly used machines end up on the second-hand market. You could purchase an entire farm of second-hand MCXL units to mill glass blocks all day long for the fraction of cost of some other options I’ve previously listed.

Picture this: you pick up an inLab cam license from Sirona, and then network together a farm of these machines. Disclaimer: there would be no automation, occlusal anatomy detail would suck, and those who dare to enter the room would probably be required to wear noise-cancelling ear protection from the screaming of those motors.

But churning out units at an average of 15 minutes a piece and margin reliability that beats out half-million dollar, 15-kilowatt behemoths. You’ve got a golden solution for a high-volume production environment to take care of such a challenging material. And since you can pick up used ones on eBay for next to nothing. If one is irreparable, just hop on an auction site and pick up a slightly used replacement. Granted, if everyone did this, we’d simply drive up the price in the second hand market and do what mining cryptocurrency has done to the cost of graphics cards.

But for that particular enterprising individual, who has just the right amount of demand, this solution might be a good fit. Personally, I find my volume of milled e.max to be declining so this MCXL farm wouldn’t be a good fit for me. Newer generation zirconias that are being released now, are rivaling e.max in translucency and overall appearance, while also being much easier to mill and touting higher strength figures.

If someone does decide to venture into this MCXL farm idea, we’d love it if you could share some pictures of your progress/setup! One piece of advice though: make sure you have a very capable service team member on your staff at all times, those machines are notoriously unreliable. The MCXL may be a terrible mill, but in my opinion, it is the BEST e.max CAD mill out there!

Have any stories about the unreliability of this machine that you’d like to share? Or do you disagree with the opinions? Throw your thoughts down in the comments section and let us know what you think about the MCXL.

imes-icore COREiTEC 350i Review

imes-icore COREiTEC 350i Review

imes-icore’s COREiTEC 350i is a Jack of all trades milling machine that can pretty much handle anything thrown at it.

HUGE Thank You to our Sponsors (hyperDENT & IMILLING) for making the production of this review video possible!

We’d really appreciate it if you would check out their links:

like & follow hyperDENT on facebook: https://www.facebook.com/followmetech/

visit IMILLING’s website: https://imilling.com/

Thanks for Watching!

Custom Shades…How “I” do it! Courtesy of DLN

Custom Shades…How “I” do it! Courtesy of DLN

Custom Shades…How “I” do it! Courtesy of DLN


There was a post on DLN the other day about how different techs go about taking custom shades. Shadevision, Easyshade, elab…

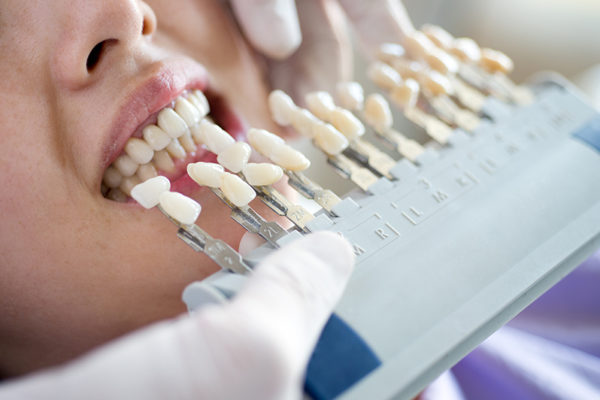
So I decided to throw my usual shade taking regimen into the ring. It was a pretty big hit with some of the users on the forum so I thought I’d share it with a wider audience here:

1) Get told that there’s a custom shade here
2) Sigh audibly and drop the 12 unit bridge I’m re-contouring
3) Shuffle into the custom shade area
4) Read script… (while mumbling to myself)
5) Count teeth and flip model around to face me (because even after 12 years I can’t recognize which quadrant is which in the mouth)
6) Double check patient’s first name
7) Call out patient’s name… butcher it
8) As they’re walking up, assess their age (Younger usually = A & B Shades, Older = C & D Shades)
9) Ask them how they are/ comment about the weather/ take a seat please
10) “looks like we’re doing X for you, alright, let’s take a look”
11) Dive in, elbows deep
12) Eyeball shade and grab the shade tab (usually A2)
13) F#@K… it’s not A2
14) Try 3 more shade tabs
15) …
16) Try A2 Shade Tab again… just for sh!ts and giggles
17) Bang on!
18) Start marking on script different characterizations
19) “gingival warming” “blue/grey incisal” “craze lines” “decalcification”
20) scribble it quickly in a language that can be likened to a chinese/arabic hybrid
21) “Can I see what shade you picked?”
22) …o_O
23) Hand patient the mirror
24) “I was thinking about bleaching”
25) Banghead
26) Pull out 3D shade guide
27) “Okay… so here are our bleach shade options”
28) “What’s the whitest one you’ve got?”
29) …OM1
30) “Nothing whiter?”
31) “Ma’am… the only shade whiter is KKK” (Don’t actually say that, just think it and chuckle to yourself)
32) Let’s go with that!
33) “Are you sure? Bleaching will only bring you a shade or two lighter at best, You’ll probably be an A1 when you’re all done. In fact, I think you should do the bleaching first and book an appointment to come back so I can take your shade when you’re done!”
34) “Nah… I don’t want to have to drive all the way out here again, plus, I might end up getting veneers… and an implant! I want that hollywood smile”
35) Are you sure?
36) YES, I’ve been saving up for 5 years to get this crown done, it costs a lot of money y’know. Might as well get what I want since I’m paying for it!”
37) (Think to myself: She’s never gonna get bleaching/veneers/or implants done… is she?)
38) … Alright! OM1 it is then!
39) (Receptionist pops her head in) Your next patient is here, it’s a shade adjust, doctor said the shade was too light…
40) Beer


Thanks for reading! For more laughs at the expense of my sanity, stick with DentalTechTips!

For an actual shade taking TechTip,

Check out our Youtube channel to see How to Arrange Your Vita Classic Shade Guide in Value Order 

The 36th International Conference on Dentistry and Dental Marketing – How I Stumbled Upon The World of Fake Conferences

The 36th International Conference on Dentistry and Dental Marketing – How I Stumbled Upon The World of Fake Conferences

The 36th International Conference on Dentistry and Dental Marketing – How I Stumbled Upon The World of Fake Conferences


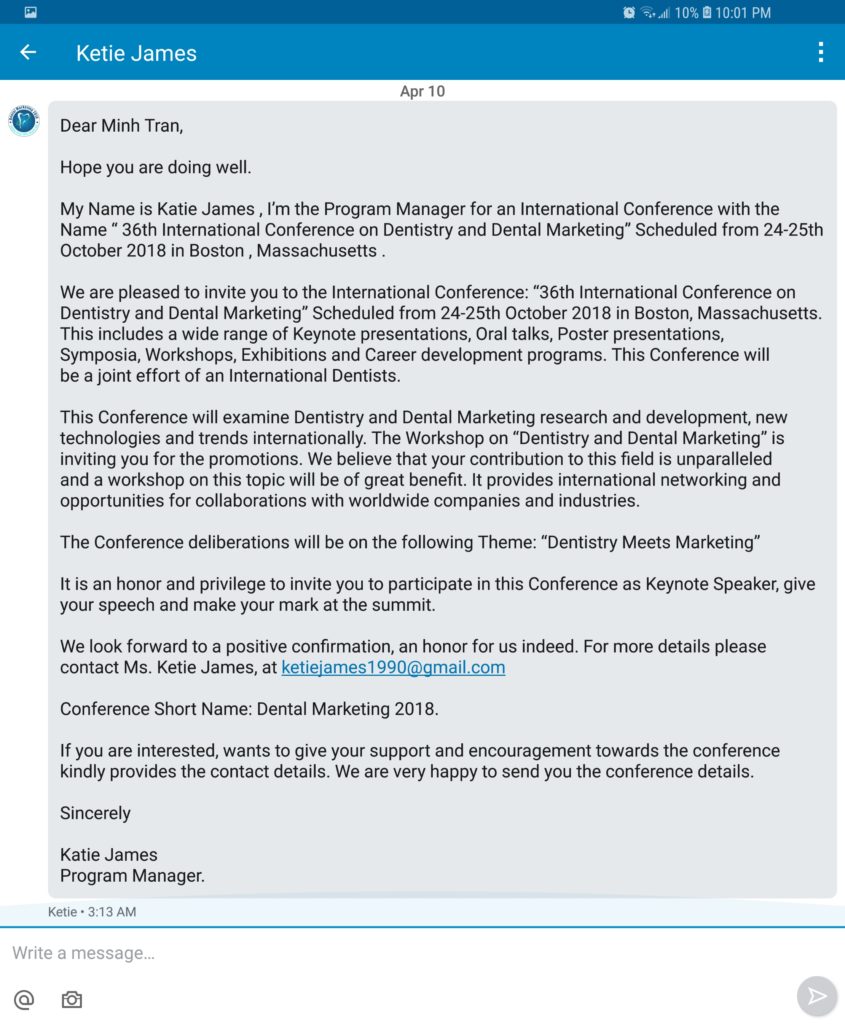
A little while back, I received this private message via linkedin.

“That’s awesome!” I thought to myself… until I paused for a moment and came to the realization that I haven’t made any “unparalleled contributions to this field”

And although I’d like to think that my blog/video content is pretty top notch. I doubt it would ever secure me a spot as a Keynote Speaker at a summit that has been a tradition for at least 35 times prior.

Shields up, Red Alert! Set phasers to skeptical.

A few other red flags include the fact that ‘Katie’ or ‘Ketie’ seemed to have a difficult time spelling her own name correctly, as well as some odd grammatical errors interspersed throughout the message; Reminiscent of Nigerian Prince scams that reside in my overflowing spam folder. So the skeptic in me decided to go digging.

The first logical stop would be to consult Google:


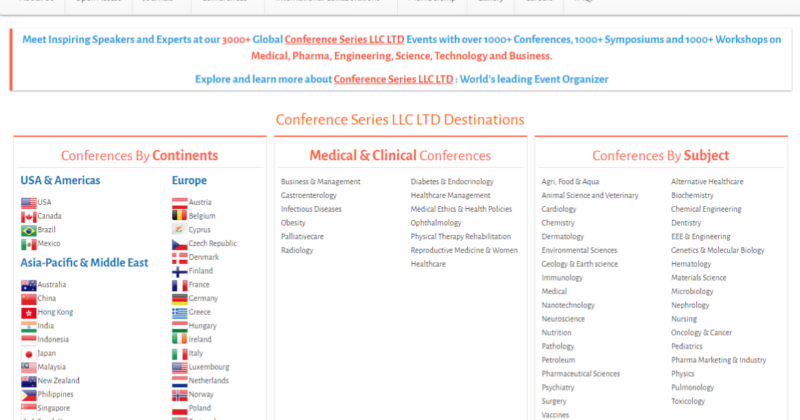
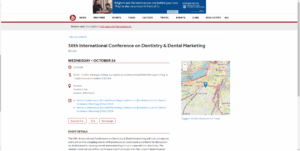
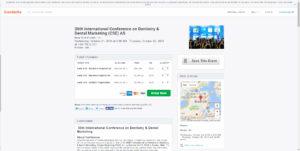
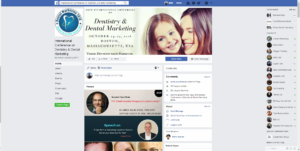
Looks pretty legit, they’ve got listings on Howard.edu, Eventbrite, Boston.com, even a Facebook page!


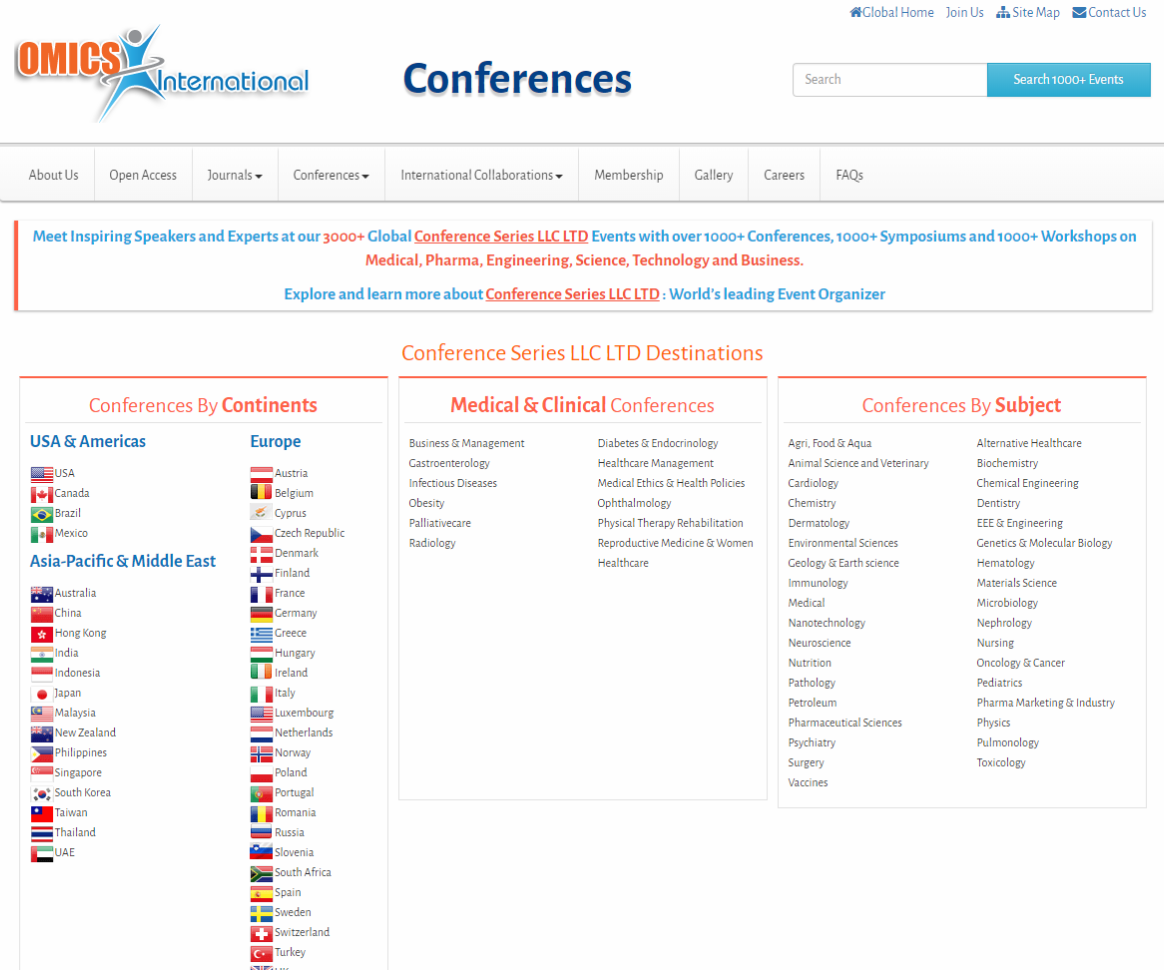
A few odd names stood out in the search results: conferenceseries.com, omicsonline.org, and omicsgroup.com.

My next search term was “conferenceseries.com scam”, and BOOM! Down the rabbit hole we go:


Huffington Post, New York Times, ResearchGate, ABC Australia, The Ottawa Citizen, Wikipedia etc.. It appears that the company OMICS, an “open access” publisher, operates in a predatory manner. It’s all a scam. In fact, the FTC filed a lawsuit against the OMICS group in August of 2016 for their deceptive tactics.
The scam goes like this: OMICS has one of their representatives contact a potential candidate. The recruiter, waxing poetic about their “unparalleled contributions to the field”, tries to assure the potential target that this is legitimate and peer-reviewed. The poor target, too self-absorbed with their own aura of success, then proceeds to PAY the organizer to be a keynote speaker at one of these fake conferences. The organizer simply rents a hotel, makes up a name and books a bunch of these fake conferences from all different scientific/medical disciplines at a single hotel venue.

Fortunately, the dental lab industry is not a field that absolutely requires academic distinguishment to advance in your career. In other scientific and medical fields however, people need to publish and lecture in order to advance professionally or to secure better jobs for themselves. These predatory practices prey on the vanity and naivety of people.

Beyond the monetary damages, it also dilutes the legitimacy of the peer-review and scientific process. OMICS falsely advertises industry experts as feature speakers who were never scheduled to appear. They do this simply to attract registrants and other “Keynote speakers”. Participants unknowingly spend hundreds or thousands of dollars to register and travel to these fake conferences.

Furthermore, investigations by Canadian news outlets like CTV News and The Toronto Star reveal that several Canadian medical journals are now owned by these predatory publishers. Those medical publishing companies, Andrew John Publishing and Pulsus Group were quietly scooped up by OMICS in 2016. Publications from these companies include: Plastic Surgery, the Canadian Journal of Pathology, the Canadian Journal of Optometry and the Canadian Journal of General Internal Medicine. In some cases, editorial staff from the affected journals have either resigned or tried to wrestle away control from OMICS.

As an independent publication that stands on providing unbiased and reliable sources of information to our readership, DentalTechTips is appalled by the predatory practices of OMICS Publishing Group. I sincerely hope that this post will serve to shed some light on this seedy underbelly of the conference circuit.

Thanks for reading. Do you have a fake conference story to share? Have you been approached by OMICS group or any other predatory publishers? Leave a comment below, I’d love to hear about it!